
I hope you'll all enjoy this awesome tutorial from Gloria, I also did a guest post on her blog, so be sure to go check that out!
~
Hey all! I’m Gloria from Inspired to Create, and my favorite type of DIY’s are clothing refashions. Beanies are easy to make, and stylish to wear. Here’s what you’ll need to make one:
~
Hey all! I’m Gloria from Inspired to Create, and my favorite type of DIY’s are clothing refashions. Beanies are easy to make, and stylish to wear. Here’s what you’ll need to make one:
- Old sweater
- A beanie to use as a template
- Scissors
- Pins
- A sewing machine or glue gun depending on your preference. I used a sewing machine.

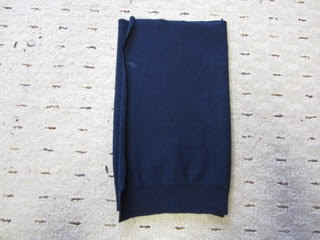
Decide how long you want your beanie and cut it off from the upper part.

Then, cut the lower part in half.

Determine how wide your head is using your template beanie or a soft ruler, and cut the material appropriately.
Tip: It’s a good idea to cut the material slightly smaller, because it will stretch. You want the beanie to fit snugly on your head.

Fold the left side of the material over followed by the right side.

Using your template beanie, round off the top part.

When unfolded, it should look like this.

Fold the material in half, making sure the “good” side is on the inside, and sew (or glue) the far edge (the right side in the pic) together.


Now, this is where it gets a tad tricky. Take the top part of the beanie, meet the edges together, and pin in place. It will form sort of a “Y” shape.

Then sew or glue the edges together.

Turn inside-out and voila!

Thanks for reading, have fun making your beanies! And be sure to check out Inspired To Create for more craft tutorials.
No comments:
Post a Comment
Reading comments always makes my day. Go ahead, drop one off.